
Shelly Cloud app
The Shelly cloud app is the starting point for all novice users. This free app for iOS and Android lets you link all Shelly products and serve as a hub to control and set the products. Please note that the app is not yet available in Dutch. So you are assigned to the English version.
To use the Shelly app you need to create an account. This also ensures that you can operate the products remotely, via the Shelly Cloud. Incidentally, all settings and scenarios are stored locally, on the Shelly devices themselves, so an internet connection is not a must for everything to work.
Add shelly devices
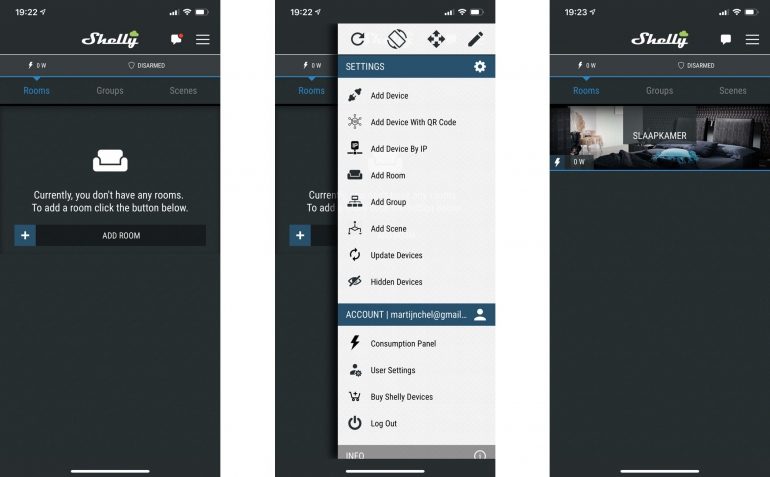
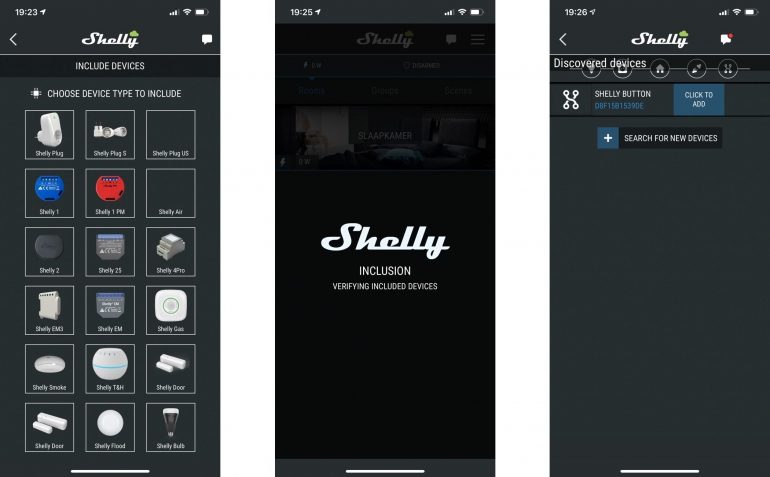
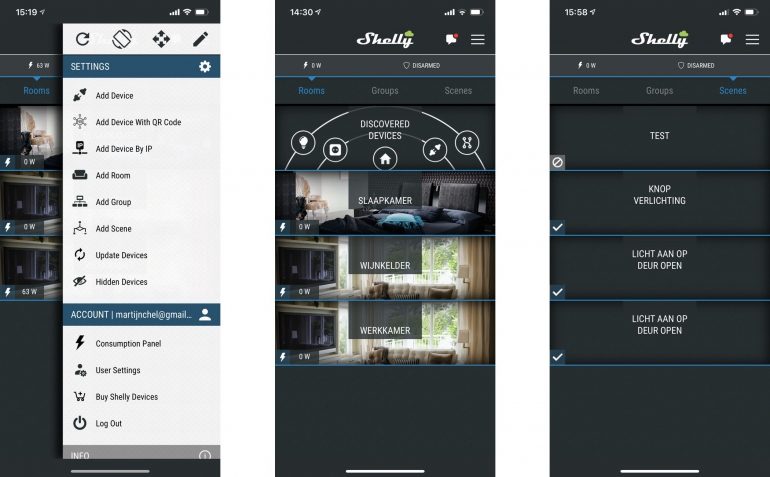
Once you have created an account, you can start creating rooms. Via the app, select ‘Add room’ and go through the settings to design the room. You can create a section for every room in the house. The next step is to add Shelly products to the app, via ‘Add device’. The devices you have connected or activated create their own hotspot and are searched for via your phone. When a device is found, you can ‘include’ it and the Shelly Cloud will be contacted to register the device. Things can often go wrong here. In 50 percent of the cases, one of these steps failed, but persistence wins. You keep going through the process until a device has been added. Then you have to wait 30 seconds and the device should appear at ‘Discovered devices’. This also sometimes happens and sometimes it doesn’t. And sometimes this window can be conjured up and sometimes not. Restarting the app or the device itself works as a solution in many cases. The installation is therefore not completely smooth. It can be quite frustrating here and there to get a device added.
But, once visible in the app, everything remains visible and accessible. You add the devices to the desired rooms and can operate them immediately. With a switch you can turn the button on or off directly and with a dimmer you can dim immediately. The status (on / off, temperature, open / closed, etc.) can also be viewed from the home screen of the relevant room, including (if applicable) the energy consumption.
Timers, schedules and scenes
Operation via the app is nice, but you want to make your home smarter. Every WiFi device from Shelly is simply a controller and can therefore save and execute rules. You can get started with timers, schedules and scenes via the app settings.
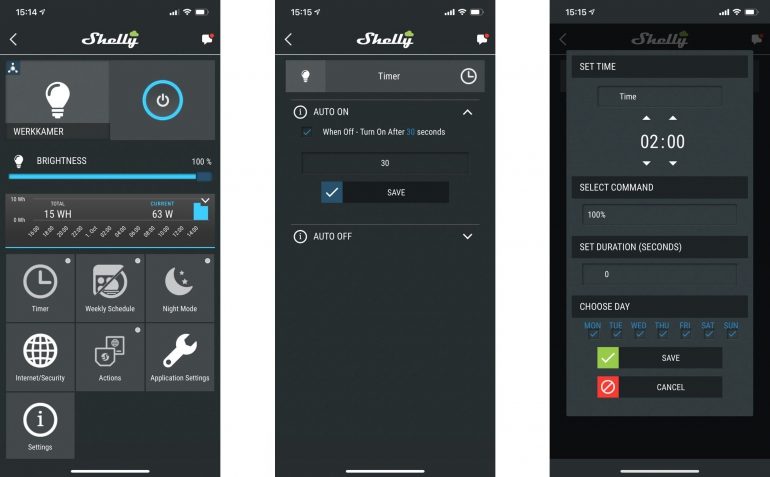
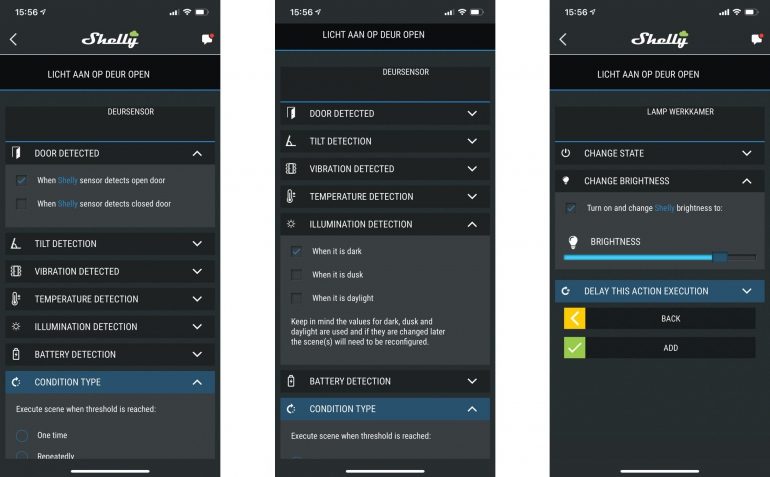
A timer is a simple way to switch a device or lamp on or off after an X number of seconds. A schedule is an option to turn a device or lamp on or off at a specific time on a specific day. You can also choose sunrise or sunset. Scenes can be created to automate things even further. For example; when it is dark (after sunset) and go to buy a door (door sensor), switch on lamp X (Dimmer 2). There are many possibilities to design your own scenes, but it remains quite basic without the possibility to use variables.
Shelly Cloud homescreen
The home screen of the Shelly app provides an overview of all rooms, with an extra tab for groups and one for scenes. If you click on a room, you will see the devices of that room and also tabs for groups in that room and scenes in that room. From the scenes tab you can manually activate a scene by clicking on a scene and tapping the play icon. There is no way to quickly start a scene from the home screen. It also takes some getting used to is the way you adjust things. You do this by going to the drop-down menu and tapping the pencil. Please note that you can only adjust things that are currently visible on the screen. If you want to adjust the spaces, you have to do this from the home screen.
Settings and settings
Where it becomes a bit more cluttered and difficult are the settings per device. There are so many that, as a novice user, you have to look carefully for what you actually need. There is no manual for the app, so be sure to read forums and use Google. We will highlight a number of important matters.
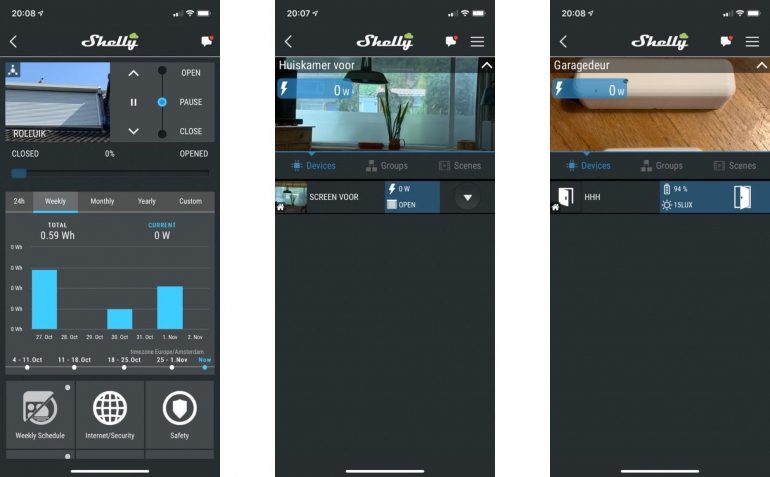
First of all, the home screen of each device. here you will find the data that immediately shows you the status. Depending on the type of device, this is, for example, the power consumption, dimming level, humidity, temperature and the status of open or closed. Data such as power consumption and temperature are displayed using handy graphs. You can also see the battery status in this screen. At the bottom of the home screen you get access to all settings. Again depending on the device, these are the sensor settings, timer, weekly schedule, night mode, application settings, internet / security settings, the Actions and the general settings.
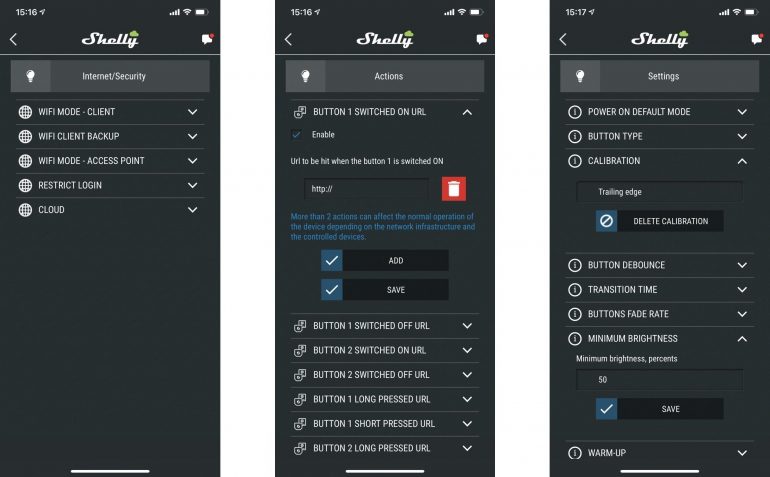
In the sensor settings you can calibrate the sensors and indicate what the change should be per sensor before an update is given. You can also disable certain sensors if desired. The application settings allow you, among other things, to exclude events of the device from the log or to exclude devices from the total power consumption. In the internet / security settings you can give each device a fixed IP address (recommended!) And you can make every device a WiFi Access Point. With the Actions you can have updates sent via http, for example to your own home automation system. The general settings give access to firmware updates, a reset and the information about the device. In addition, for dimmers / switches you can find options for calibration, warm-up, the type of button (push button for example) and the standard start mode. For actors you also have settings for timers, schedules and a night mode. So there are a lot of settings, most of which you will not adjust as a novice user. For those novice users, a simple manual would be a welcome addition.


Add Comment